This is an old revision of the document!
Table of Contents
How To Use DMap
Introduction To Normal Operation
Let's start this tutorial with an example that hits the most important points.
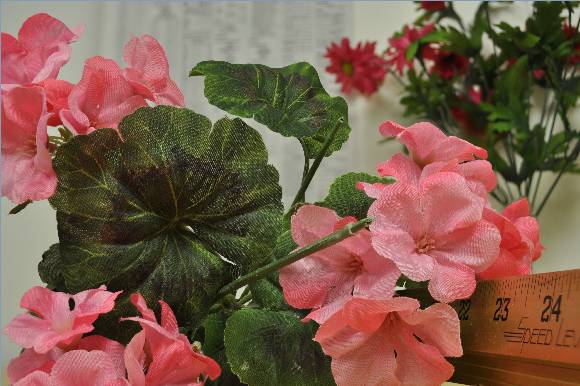
Here is a common situation, shown as we want the result to appear. The main subject is sharply focused everywhere, while the background is smoothly blurred.
Here is the full frame:
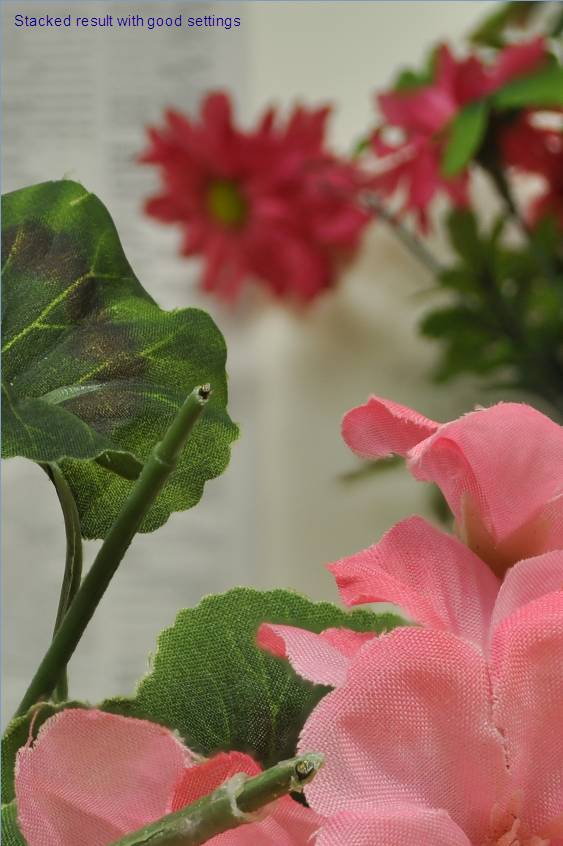
And here is a crop showing focused foreground and nicely blurred background.
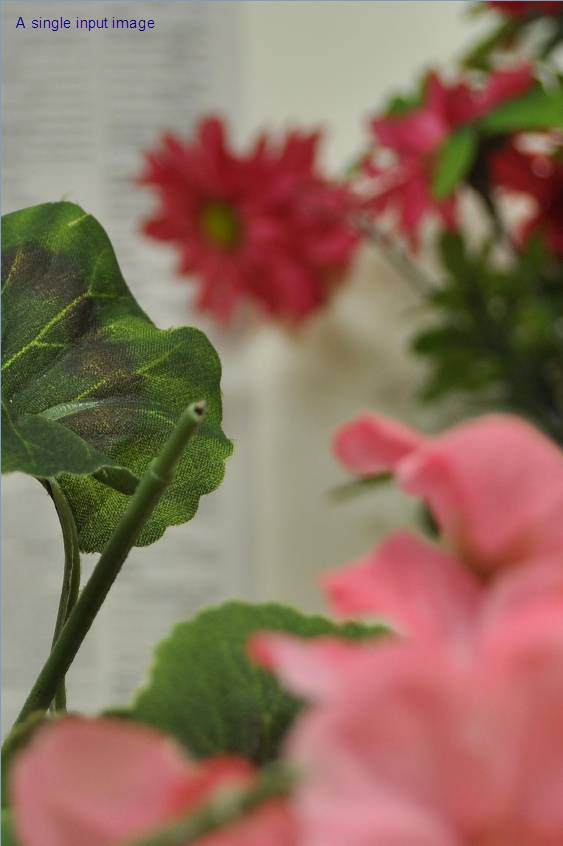
By the way, the above definitely is a stacked result. Here is a single input image. Notice the pink petal and green leaf, and compare with the previous image.
Left to itself, DMap probably will not produce the nicely blurred background that we want. The reason is that Zerene Stacker is mostly in the business of preserving sharply focused detail. Where there is no sharply focused detail, it's likely to end up trying to preserve noise. So you have to give it some guidance , essentially telling the software “This is where I care about detail, and this is where I prefer smooth gradations”.
The way you specify detail versus smooth gradations is by a control called “contrast threshold”. In most cases, you'll be using an interactive slider to set the threshold, while watching a “preview image” to get some idea what the effect will be. The image you watch isn't “preview” in the sense of “what you see is what you'll get”. Instead, it's a masked image. You see normal colors in areas where you care about detail, and black in areas where you care about smooth gradations.
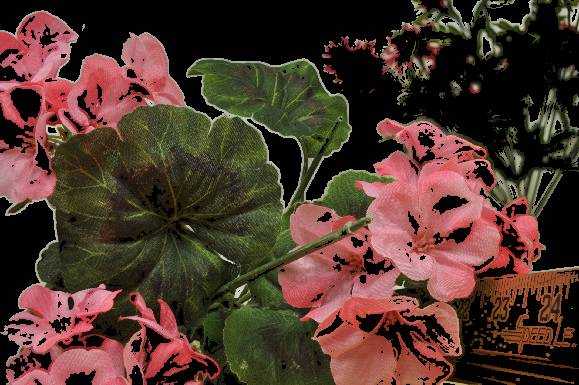
A good strategy for setting the contrast threshold is to make most of the unfocused areas go black in preview, while leaving most of the focused detail in its normal colors. That's what produced the result shown above. The preview image and contrast slider looked like this:
The value 35.0 that appears above the slider is just the percentage of image area that happens to be marked in black. There really is no “typical” value. If your image happens to be mostly unfocused or featureless background, then you'll move the slider to make most of that area turn black and the number may approach 100. If your image is completely covered with sharply focused detail, then you'll go the other way and the number may approach 0. It all depends on the subject and composition, and you should determine it by watching the image, not the number.
When you're setting the slider, it's common to develop some black areas inside the focused subject, as shown here with many of the pink petals. Those black areas are generally harmless. They just represent parts of the subject where detail is either lacking or low contrast, and they won't cause a problem as long as they're surrounded by non-black areas where there is significant detail.
Problems You May Encounter
Now that you have some idea how to make DMap work well, let's look at a few ways to make it work badly. After you've seen the examples, we'll explain how DMap actually works, so you can start to make sense of all these results.
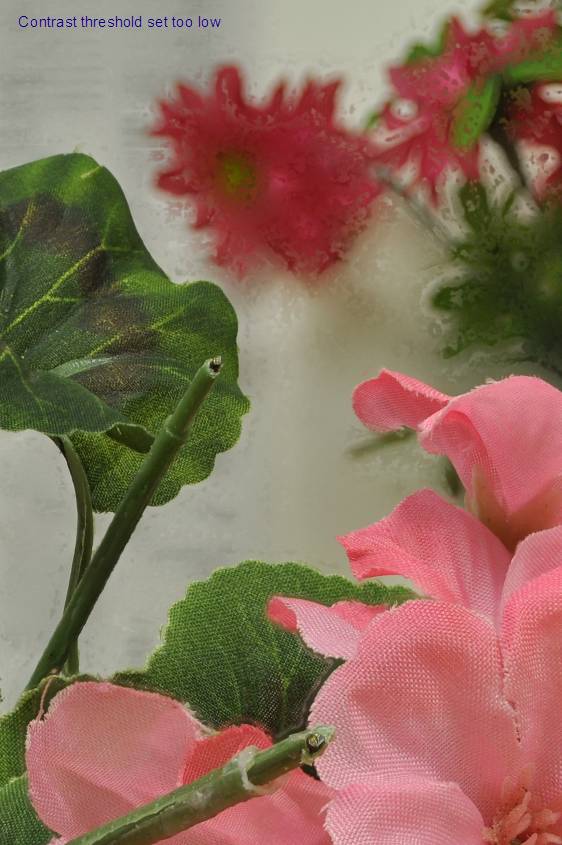
One common mistake is to leave the contrast threshold set too low. That causes the frame selection for out-of-focus areas to be determined mostly by random noise. The result can be an ugly mess of blotches, like this:
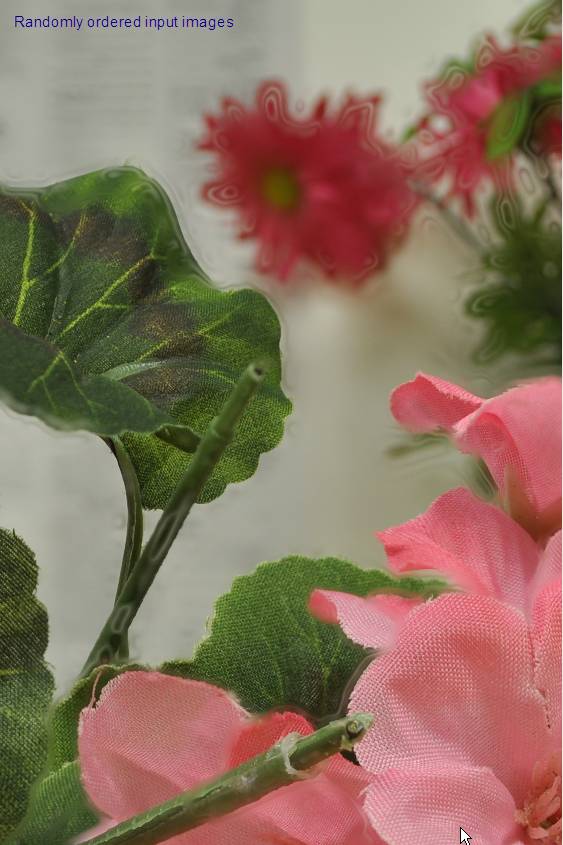
Another mistake, far less common but serious when it happens, is to present DMap with a set of images that were focused in random order instead of sequentially front-to-back or back-to-front. This often produces really nasty swirls and halos, as in the following example:
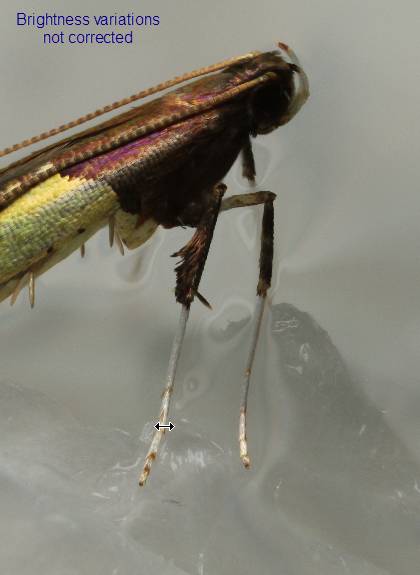
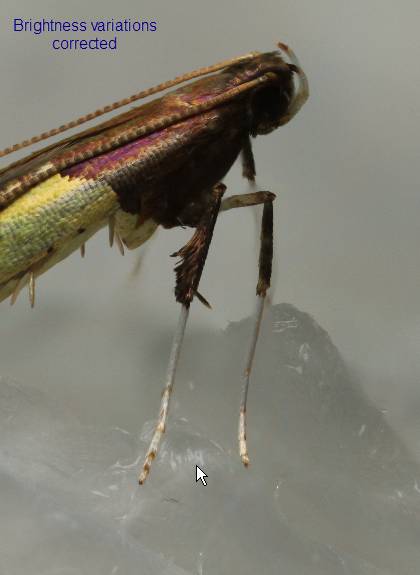
Something similar happens when there are variations in exposure or changes in background due to varying illumination, so that unfocused areas are brighter in some images, darker in others. In the example that follows, the stack has signification variation in exposure from one frame to the next due to random variation in flash intensity. Notice the swirls and halos caused by the variations in exposure. These can be largely corrected by ticking the brightness box in Options > Preference > Alignment, but if possible it's best to avoid them entirely by using manual exposure and stable illumination.
The other controls: Estimation Radius and Smoothing Radius
Now we're talking again about normal operations.
In addition to the contrast threshold setting, DMap is controlled by a couple of other “radius” parameters: Estimation Radius and Smoothing Radius. These controls are located in Options > Preferences > DMap Settings. Roughly speaking, Estimation Radius controls the size of detail that DMap considers when deciding which source image is in focus, and Smoothing Radius controls how quickly DMap will switch from one source image to another. As a matter of practice, it works well to just set Smoothing Radius equal to half the Estimation Radius. That's the default setting, so we won't talk further about Smoothing Radius.
Subjects with simple structure and no fine detail will work best with large radius settings, while subjects with complex structure and lots of fine detail will work best with small settings.
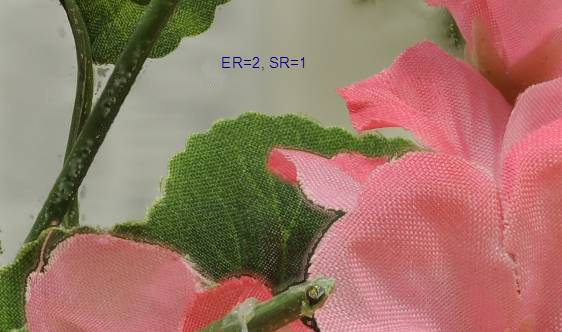
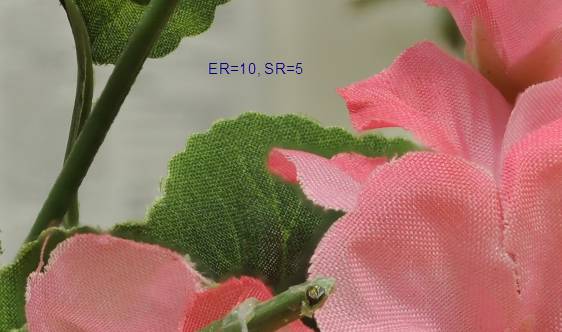
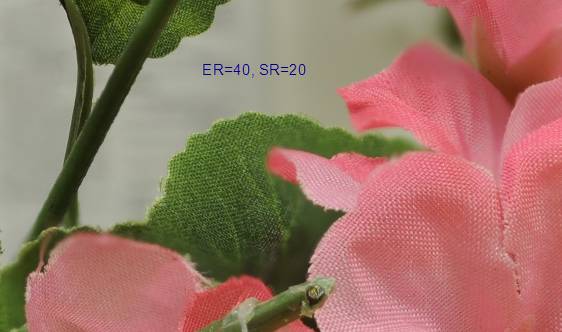
As an example, here's what happens as we change Estimation Radius for our example stack of artificial flowers:
Quickly summarizing… If Estimation Radius is too small, then you're liable to get hard-edged halos plus blotches in areas of low contrast. If Estimation Radius is too big, then you're liable to get large loss-of-detail halos and some fine features may be missed altogether. Some place in the middle is the best setting – not too big, not too small. The default settings are appropriate for most stacks, but if your subjects have unusually fine structure, or alternatively have no fine structure at all, then you may need to adjust the Estimation Radius to match. Larger radii are also appropriate to minimize ghosts and echos if you have to deal with subject movement.
How DMap Works On The Inside
Now that we've seen some results, let's look at how DMap works on the inside. That will help you to understand why it produces the results that it does, and how to make them better by adjusting the DMap settings.
The DMap method is based on a simple concept: For any particular pixel position, just examine all the input images to determine which one has the best focus. Grab the pixel value from that image. Do this for all pixel positions, and you'll get an image that is focused everywhere.
In practice, this simple concept needs some refinement to work well. There are two main issues:
- It turns out that there's no way to determine how well an image is focused by looking at just one pixel – the software has to look at nearby pixels also. Estimation Radius controls the definition of “nearby”.
- Most scenes have some areas where there is not enough detail to tell reliably which input image has the best focus. Those areas have to be identified so that the proper image to use can be determined from other information. In Zerene Stacker, this identification is carried out mostly by using the “contrast threshold” slider. Pixel positions that contain only low contrast information are less trustworthy to determine focus, because the calculation gets disturbed by random pixel noise and by out-of-focus blurs from nearby strong edges. By setting the threshold, you use your human judgment to specify which locations can be trusted and which cannot. At locations that cannot be trusted, DMap ignores its estimate of depth based on image content, and instead switches to a different scheme that bases the estimate on surrounding pixel positions that can be trusted. In the terminology that we used earlier, the locations that can be trusted are described as being where you care about detail, and the locations that cannot be trusted are described as being where you prefer smooth gradations. There's only one mechanism, but it can be used for two different purposes – either to emphasize smooth gradations or to help guide the software to make proper decisions for the images at hand.
The final refinement is “smoothing”. It turns out that even with both of the above refinements, there is still a bit of noise in the estimates of which image has the best focus. To reduce this error, a weighted average is taken of estimates at nearby pixel positions. Again, there's a numeric definition of “nearby”, and this time it's determined by Smoothing Radius.
In the end, what DMap ends up computing is a sort of “Depth Map” — hence the name. The word “depth” refers to distance from the camera, or more precisely, image position within the stack. The word “map” describes a sort of virtual surface that hugs tightly to the focused subject where it can, and varies smoothly elsewhere. You can think of the depth map as being similar to a thin rubber sheet that gets pressed down through the stack of input images. At each pixel position where some image contains contrast above the threshold, the sheet sticks tightly to the image with the strongest detail. At other pixel positions, the sheet stretches so as to make smooth gradations between the positions where it is stuck to detail. Then as a final step, the sheet is allowed to come unstuck just a little bit to make it smoother. After the rubber sheet has come to its final position, the result image is computed by choosing pixels from input images based on the rubber sheet’s position. Where the sheet is firmly attached to one input image, the output pixel values are exactly those of that one image; where the sheet lies between two input images, the output pixel values are a weighted average of those two images.
Now that you understand how DMap works, you can probably understand why it produces the results that it does. What you want is for the depth map to accurately track the subject where you care about detail, and to vary smoothly in detail-free areas where you care more about smooth gradations. If the contrast threshold is too low, then in areas where there is no focused detail the software ends up getting misled by noise and the depth map is liable to flail wildly between several images. That’s what produces the crazy halos and blotches. If the input images are out of order, then it’s almost guaranteed to do that. If the estimation radius is too big, then the software can't track edges very well, and if it's too small, again it's more likely to get misled by noise.
The best settings are a matter of art, not science, because they depend on the result you're trying to achieve. If your sense of esthetics is bothered by halos but not by missing detail, then you should use relatively large settings. If you're driven to preserve every bit of detail and are willing to fix halos by retouching, then you'll probably be happier with relatively small settings.
Dealing With DMap's Limitations
With some stacks, you can get a great result from DMap alone. But sometimes you can't, and sometimes it's more trouble than it's worth.
One aspect is that in many stacks, the pixel values you want don't appear in any input file!
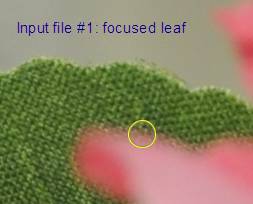
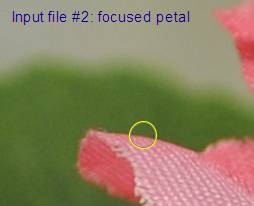
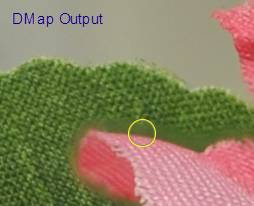
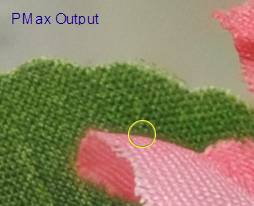
As illustration, consider the following actual-pixels crops from our sample stack:
What we want to see, of course, is a focused green leaf right up to the edge of the pink petal. But notice that in the area near the foreground pink petal, the background leaf is never seen both focused and green. The leaf looks properly green when the petal is focused, but when the leaf is focused, it's overlaid by pink haze from the out-of-focus petal in front of it. The underlying reason is simple optics: when the leaf is focused, the cone of light being admitted by the lens also includes part of the petal, and the light from the petal produces the pink haze. The camera simply never sees the background leaf in the way that we'd like it to appear in the final output.
There's no way around this problem using DMap or any other software that relies on just “picking out the sharp bits”.
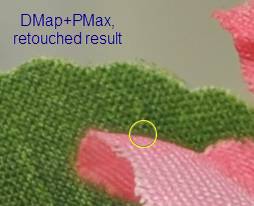
In Zerene Stacker, however, you can work around the problem to a considerable extent by using PMax. The trick is to realize that even though PMax has other drawbacks, it is remarkably good at resolving overlapping edges. In the current case, for example, it teases apart the overlap to essentially combine color information from the focused-petal image with luminance information from the focused-leaf image. The result is very close to what we really want: a focused green leaf right up to the edge of the pink petal.
So, the trick for producing the best possible result with this stack (and many others) is to run both DMap and PMax, then use human judgment and retouching to combine PMax's better handling of troublesome overlaps with DMap's better handling of colors, contrasts, and noise in regions that are easier to manage. This method is described in the retouching tutorials using other stacks. For the example here, the result looks like this:
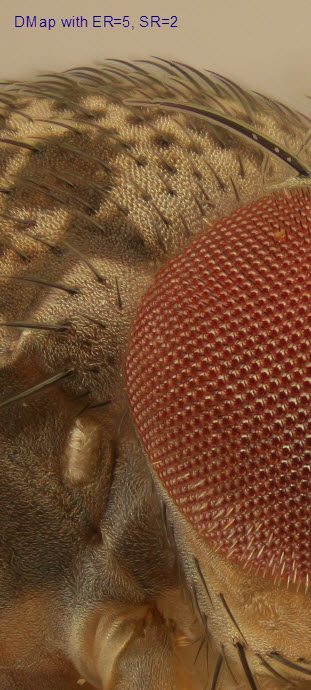
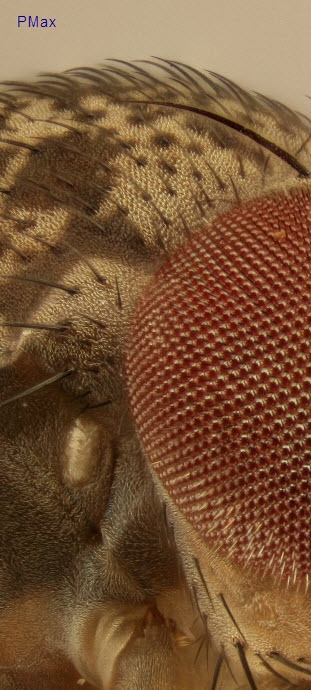
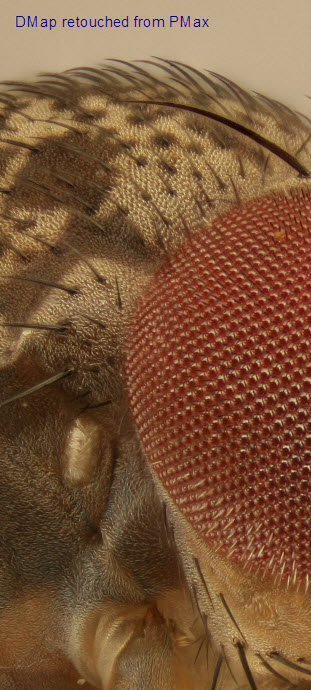
A similar problem occurs when the 3D structure of the subject is just too finely detailed to be adequately captured by the depth map. This commonly occurs at high magnification when dealing with hairy or bristly subjects, such as the Fruit Fly seen here through a microscope. Notice that the retouched version combines the overall color and contrast of the DMap result (which is faithful to the input frames), with the improved handling of fine overlaps that is provided by PMax.
At lower magnifications, this situation is likely to occur when the subject is both deep and complicated, such as shooting the interior of a bush that has many overlapping branches.
Summary
DMap stands for “Depth Map”. It works by fitting a “rubber sheet” depth map to places in the stack that show significant detail, then selecting pixel values from input frames as indicated by the map.
To get the best results from DMap:
- Set the contrast threshold slider so that out-of-focus areas show mostly black in preview, while in-focus areas show mostly in their natural colors.
- If needed, then
- Retouch from PMax in areas where DMap cannot do a good job (typically around edges of foreground structures).
- Consider adjusting the Estimation Radius based on experience with your own subjects and equipment, following the guidelines discussed above.
We hope you've enjoyed this explanation of how DMap works and how to use it. Thanks for reading!
